Type Management
You can check the recipient types provided by Felice or create and manage your own recipient types.
Default Recipient Type List
| Type | Description |
|---|---|
| Send emails | |
| Jira | Add alarms as issues in Jira (requires Jira server to be configured in advance) |
| Slack | Send alarms to Slack channels |
Default Recipient Type Details
View the default recipient types provided by Felice. First, select a default recipient type and move to the details page.

On the details page, you can see information about the recipient type, and whether the tags or HTTP headers customization can be used when creating targets.

Since default recipient types are provided by Felice, you cannot delete them.
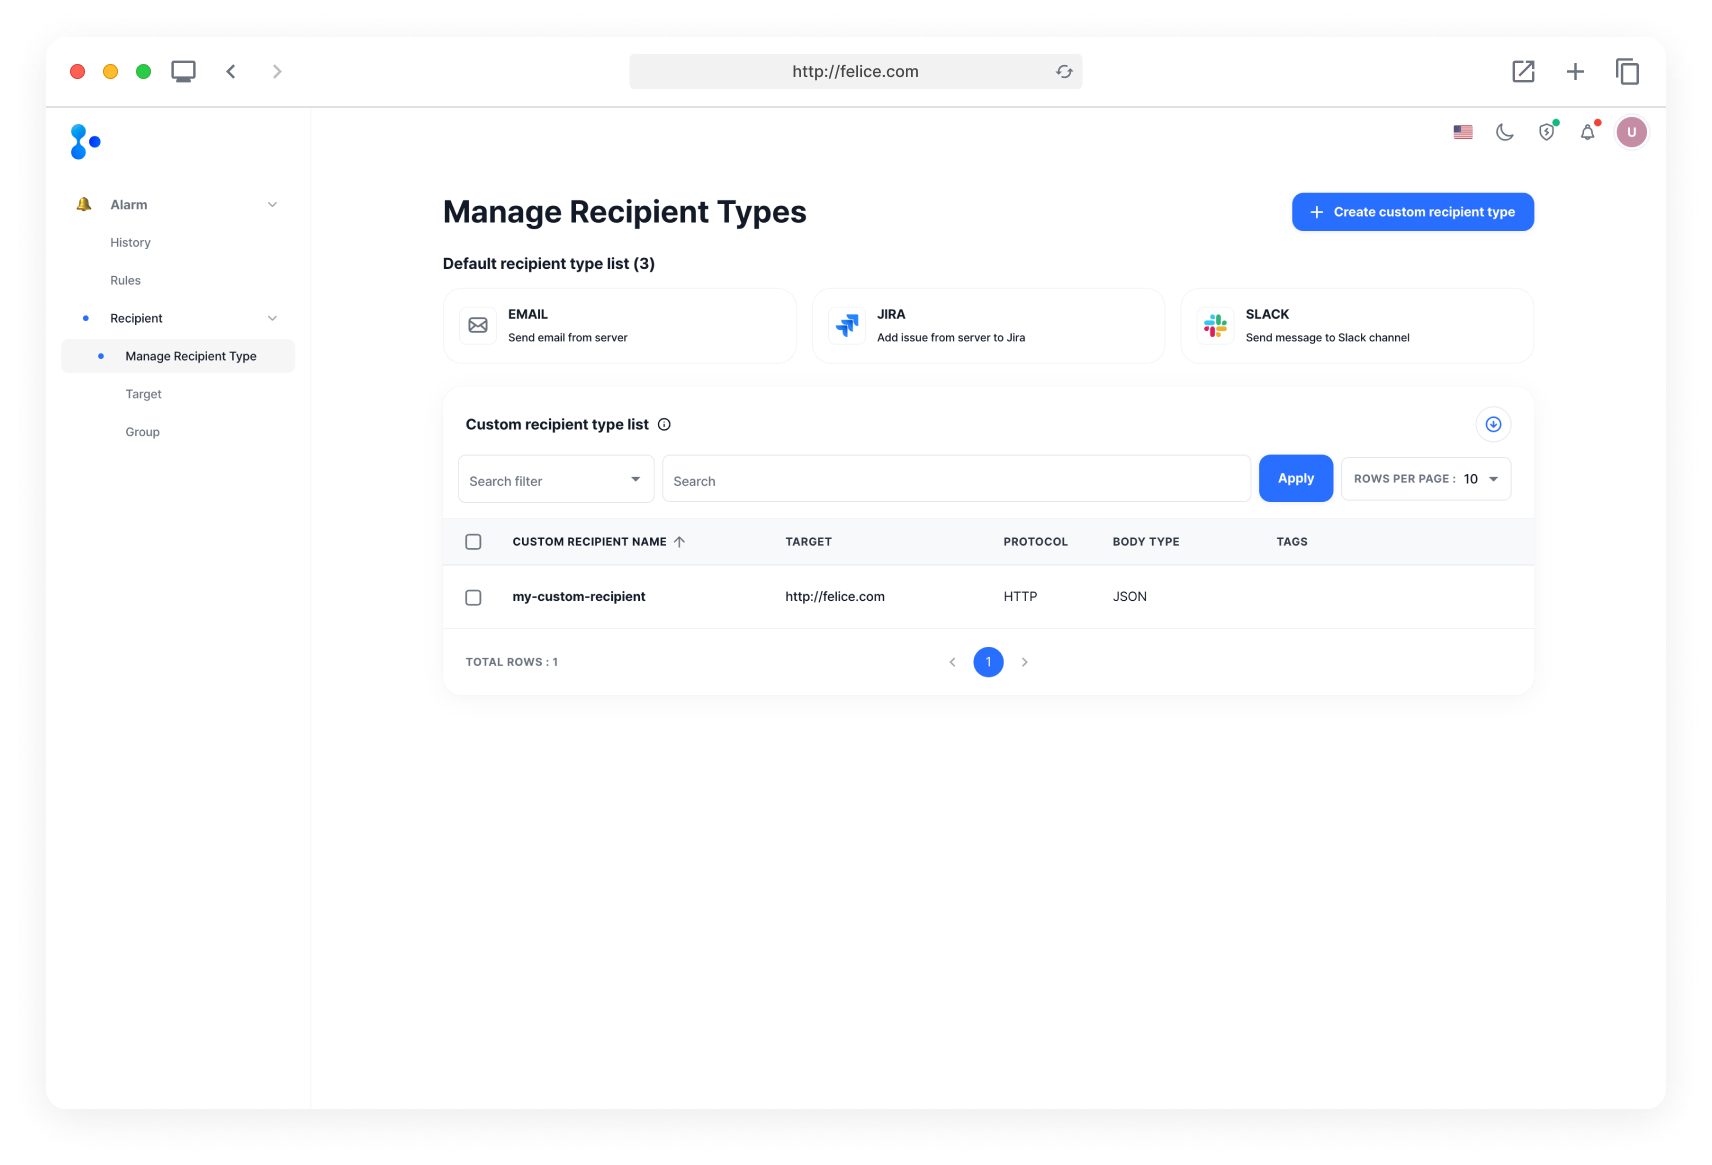
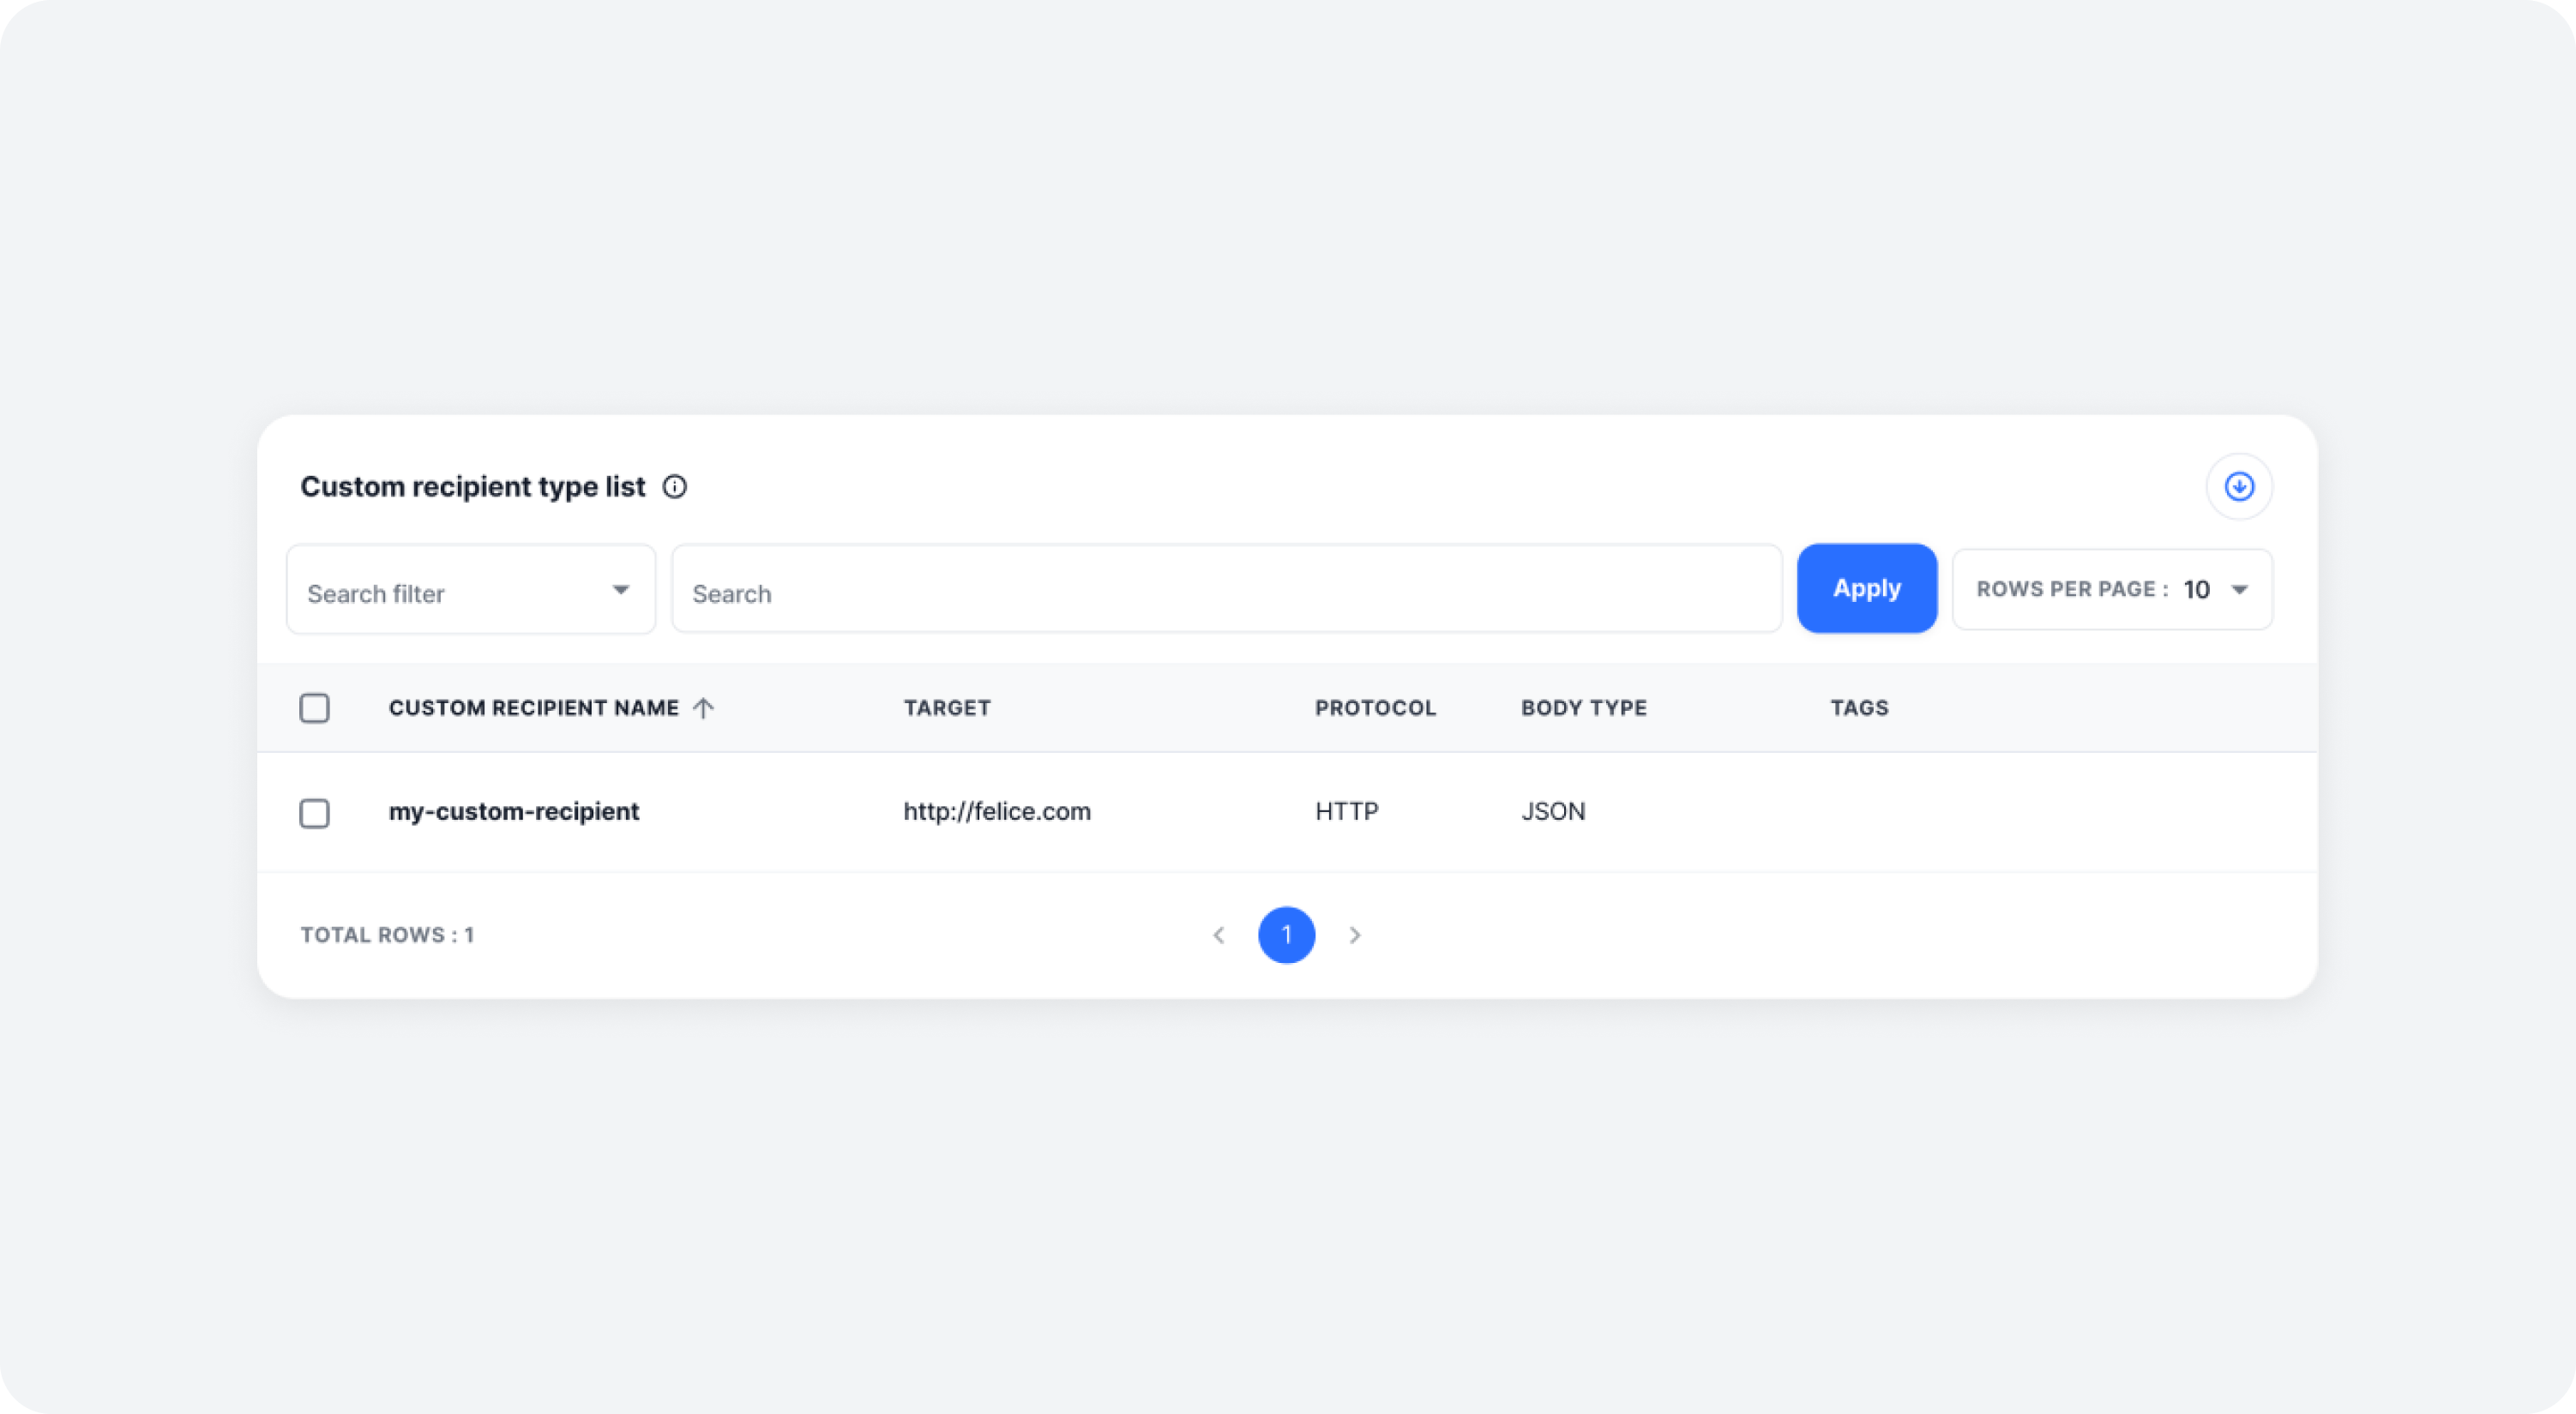
Custom Recipient Type List
In the Manage Recipient Types page, you can view the list of custom recipient types created by users. Click on the [Recipient Type Name] in the list to move to the custom recipient type modification page.
When searching by tag and field name, if a specific recipient type's tag or field name is "DataPlatformTeam," you must enter exactly "DataPlatformTeam" to find the desired custom recipient type.
| Filter | Description |
|---|---|
| Creator | Search by the name of the user who created the recipient type |
| Tags | Search by the tags assigned to the recipient type (exact name search required) |
| Name | Search by the name of the custom recipient type |
| Target | Search by the target URL to which the alarm will be sent |
| Fields | Search by the body or header field name assigned to the recipient type (exact name search required) |
Creating Custom Recipient Type
First, click on [Create custom recipient type] button on the Manage Recipient Types page, to access the Create custom recipient type page.

Recipient Type Config
Enter the information for the custom recipient type you want to create.
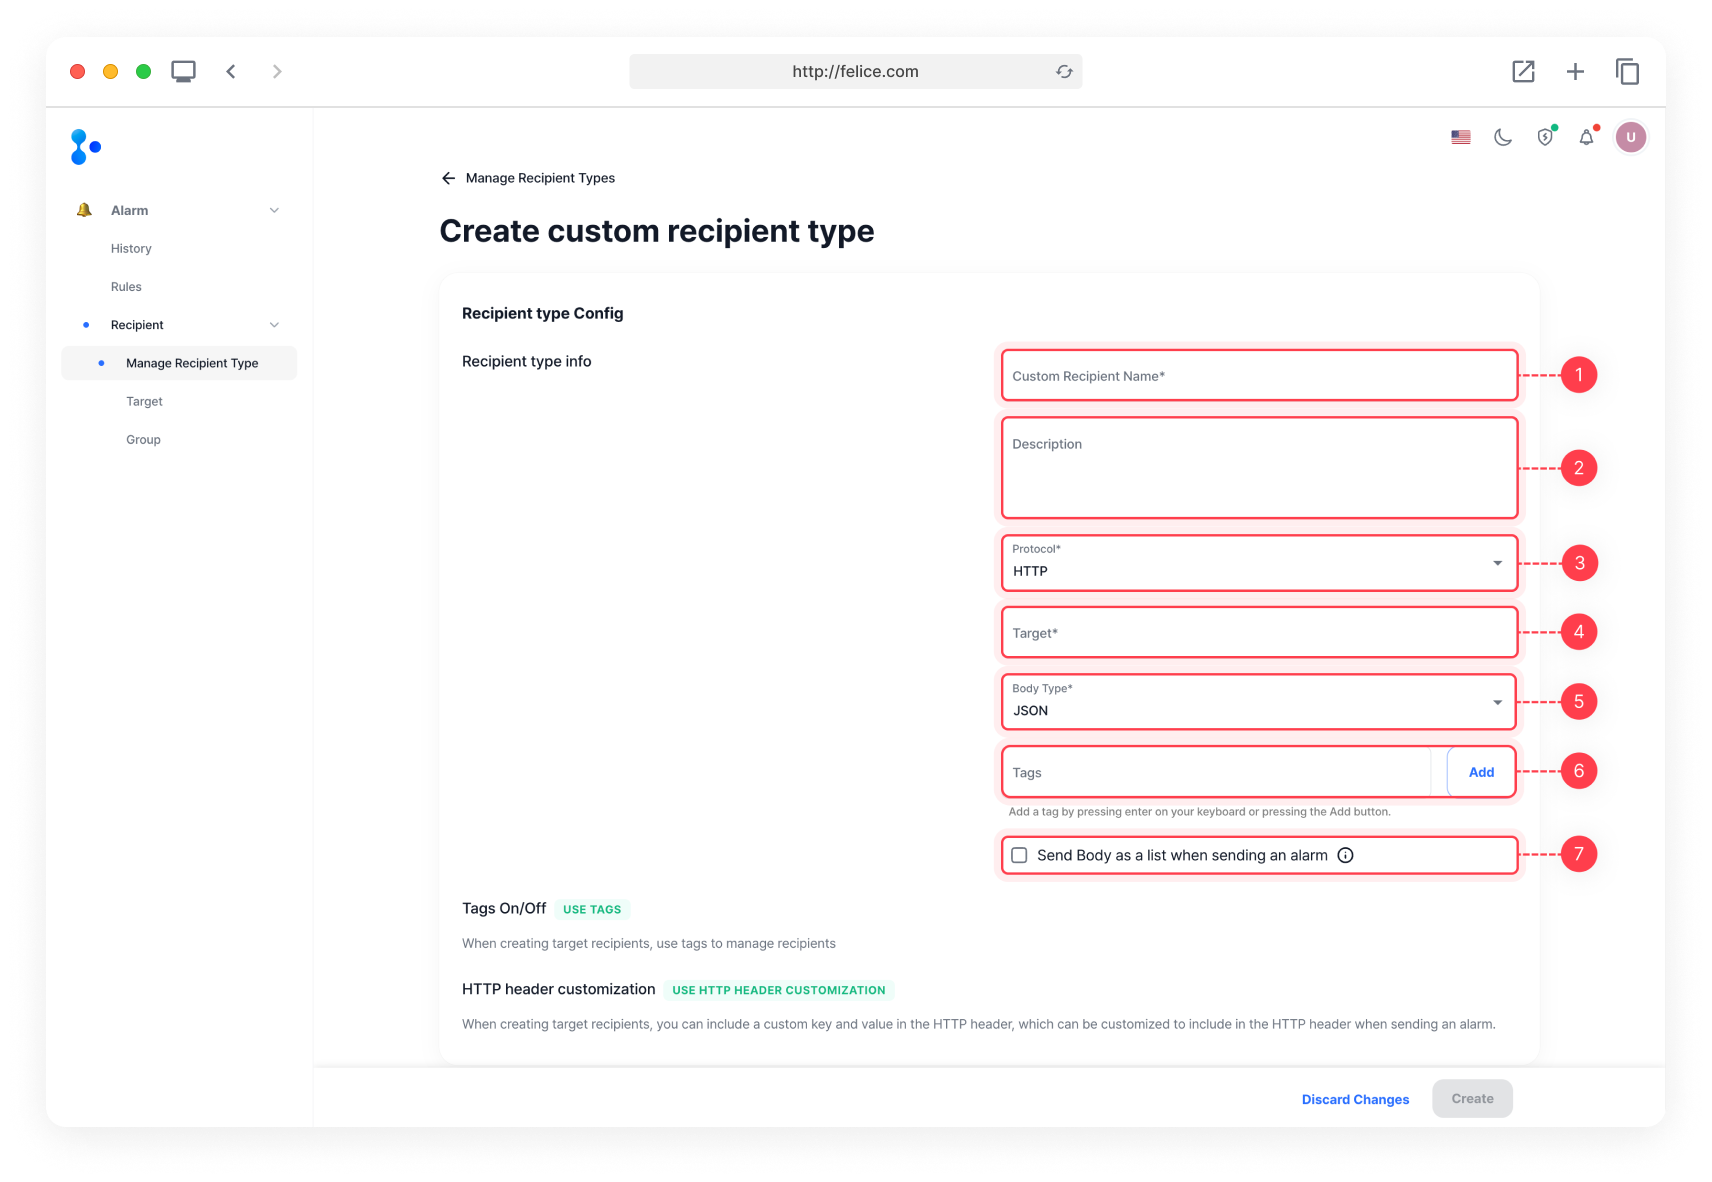
Recipient Type Basic Input Information
| Field | Description |
|---|---|
| ⓵ Custom Recipient Name | Name of the custom recipient type (overlapping names or empty strings not allowed) |
| ⓶ Description | Description of the custom recipient type |
| ⓷ Protocol | Format of protocol to be sent to the channel |
| ⓸ Target | URL of the target channel the alarm will be sent to |
| ⓹ Body Type | Type of the body data to send alarm to channel (target) |
| ⓺ Tags | Tags of the custom recipient type |
| ⓻ Send Body as a list when sending an alarm | By checking this flag, you can send the Body as a list when sending alarms |
- HTTP
- JSON
Custom Fields
You can customize the header and body fields to be sent with the custom recipient type.
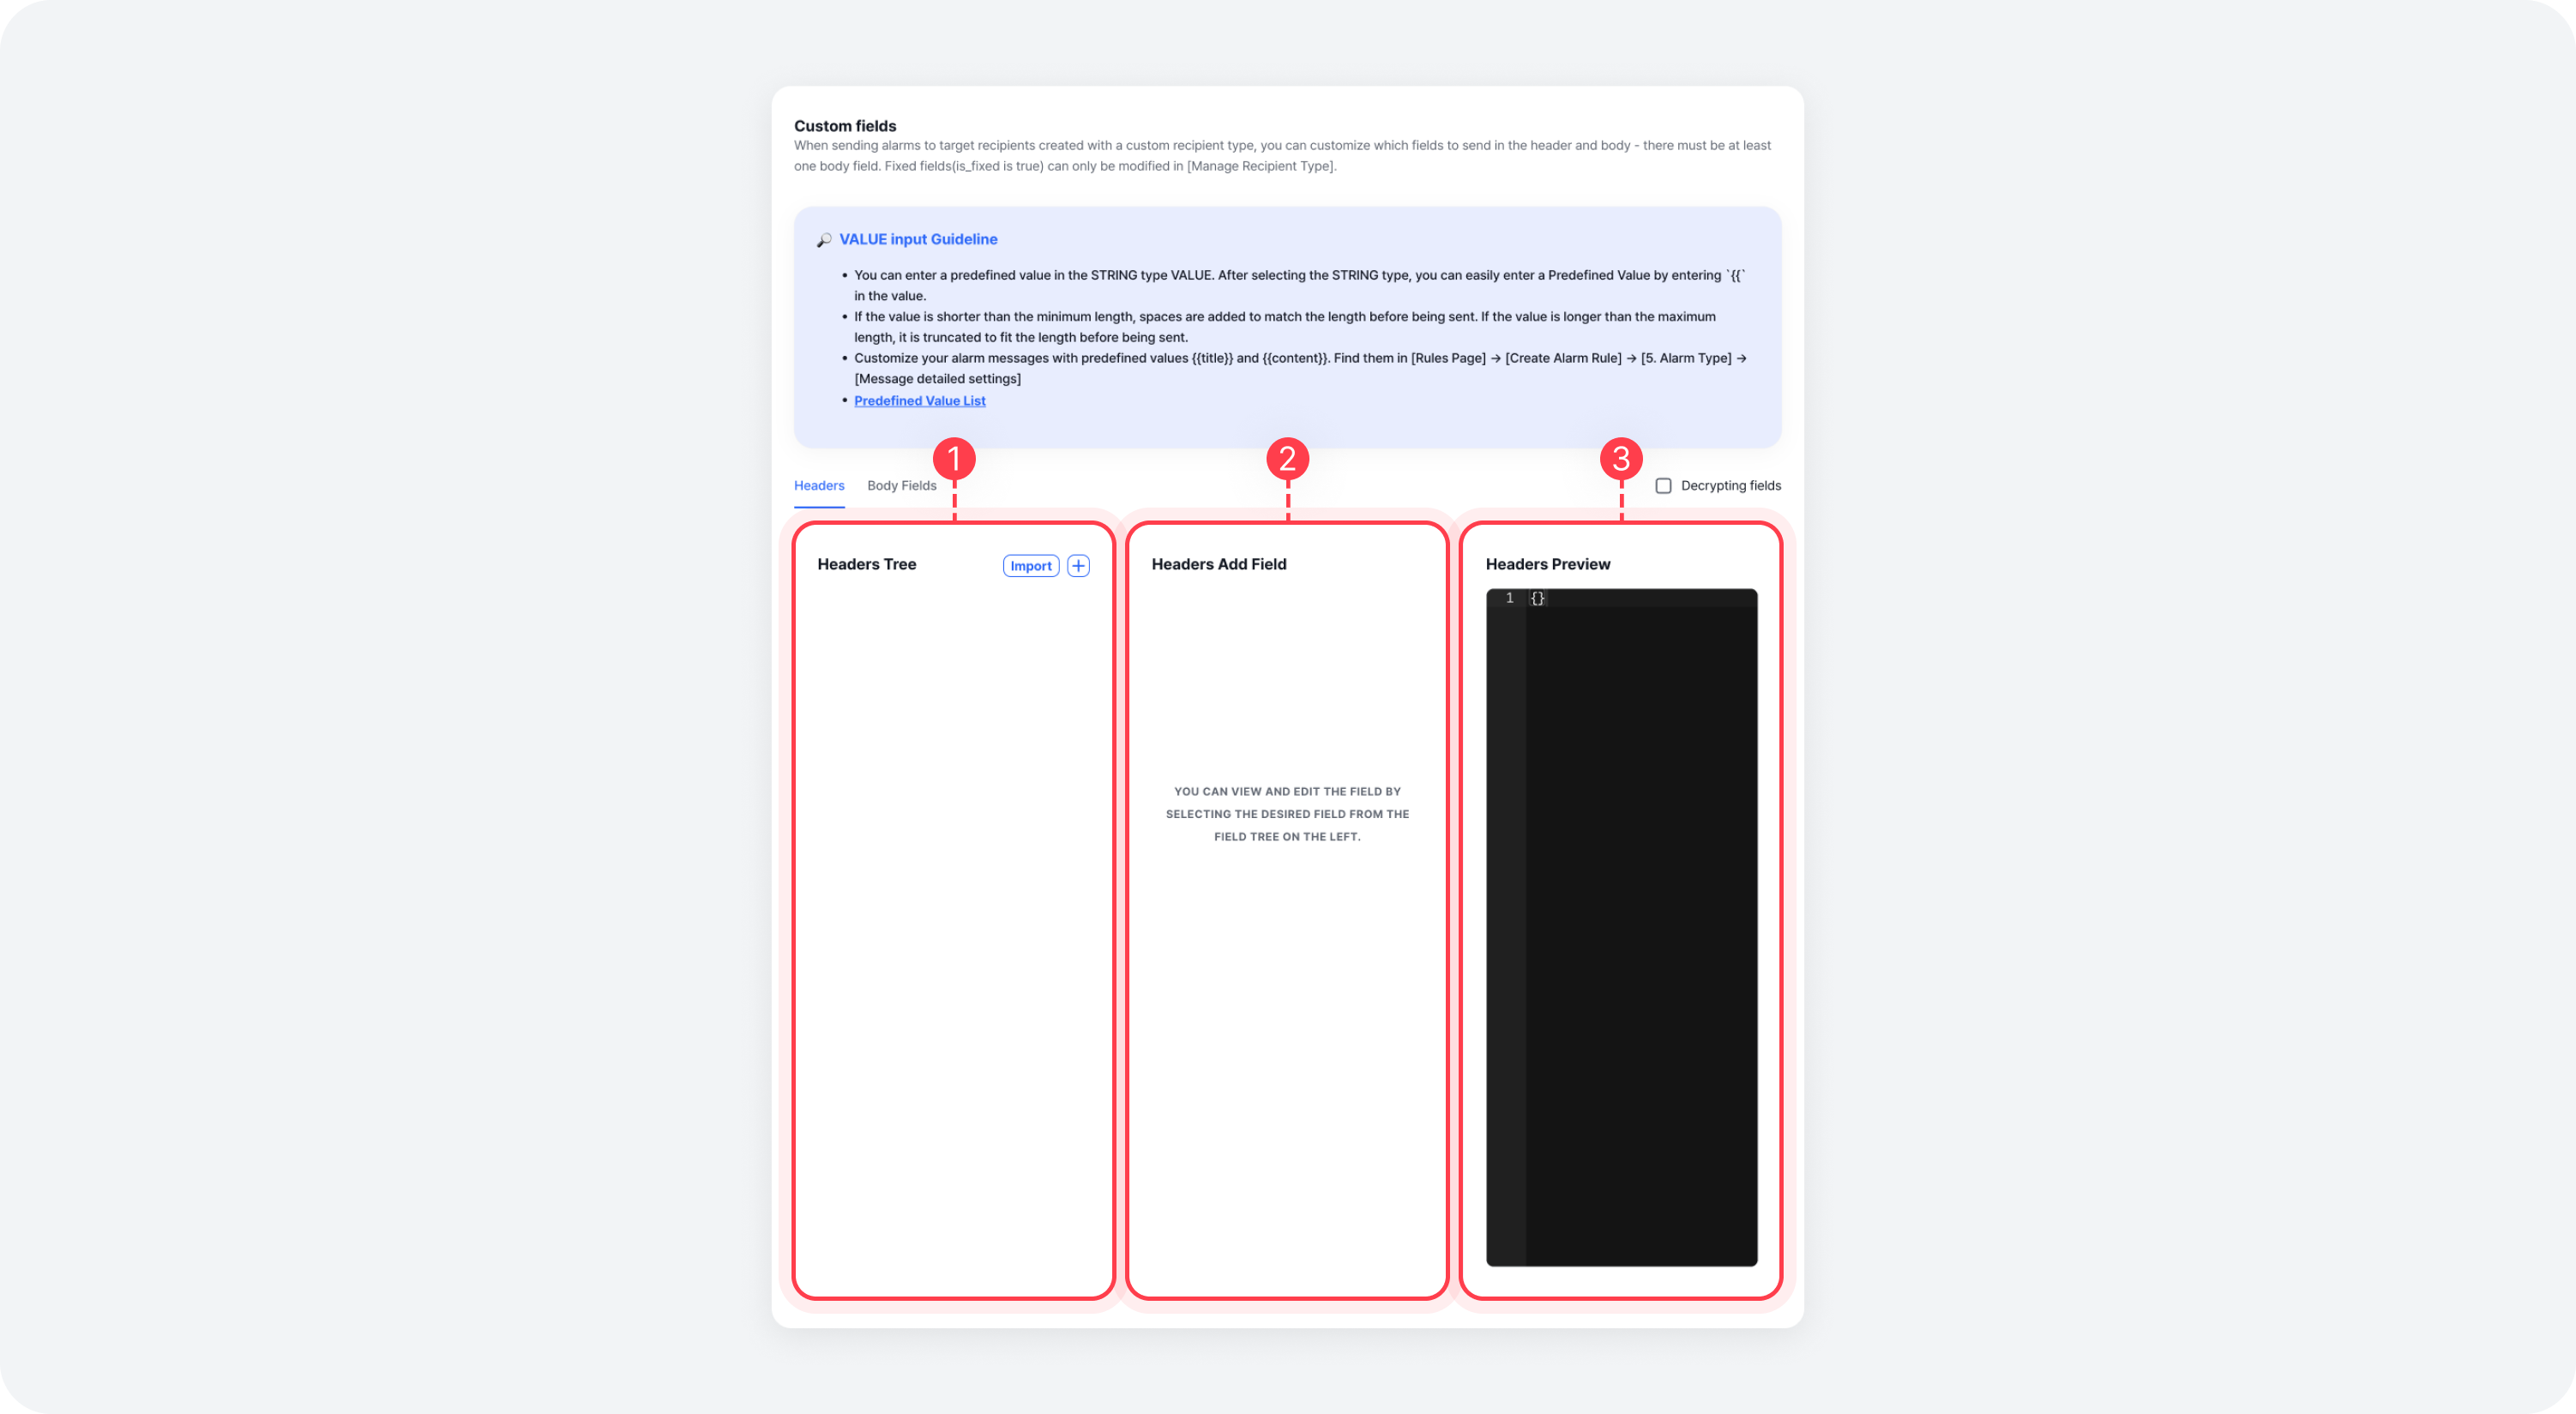
| Field | Description |
|---|---|
| ⓵ Fields Tree | Displays fields in a tree format (supports drag and drop) |
| ⓶ Fields Form | A form for creating or editing fields |
| ⓷ Fields Preview | In JSON format, displays the field tree to be sent in the actual alarm |
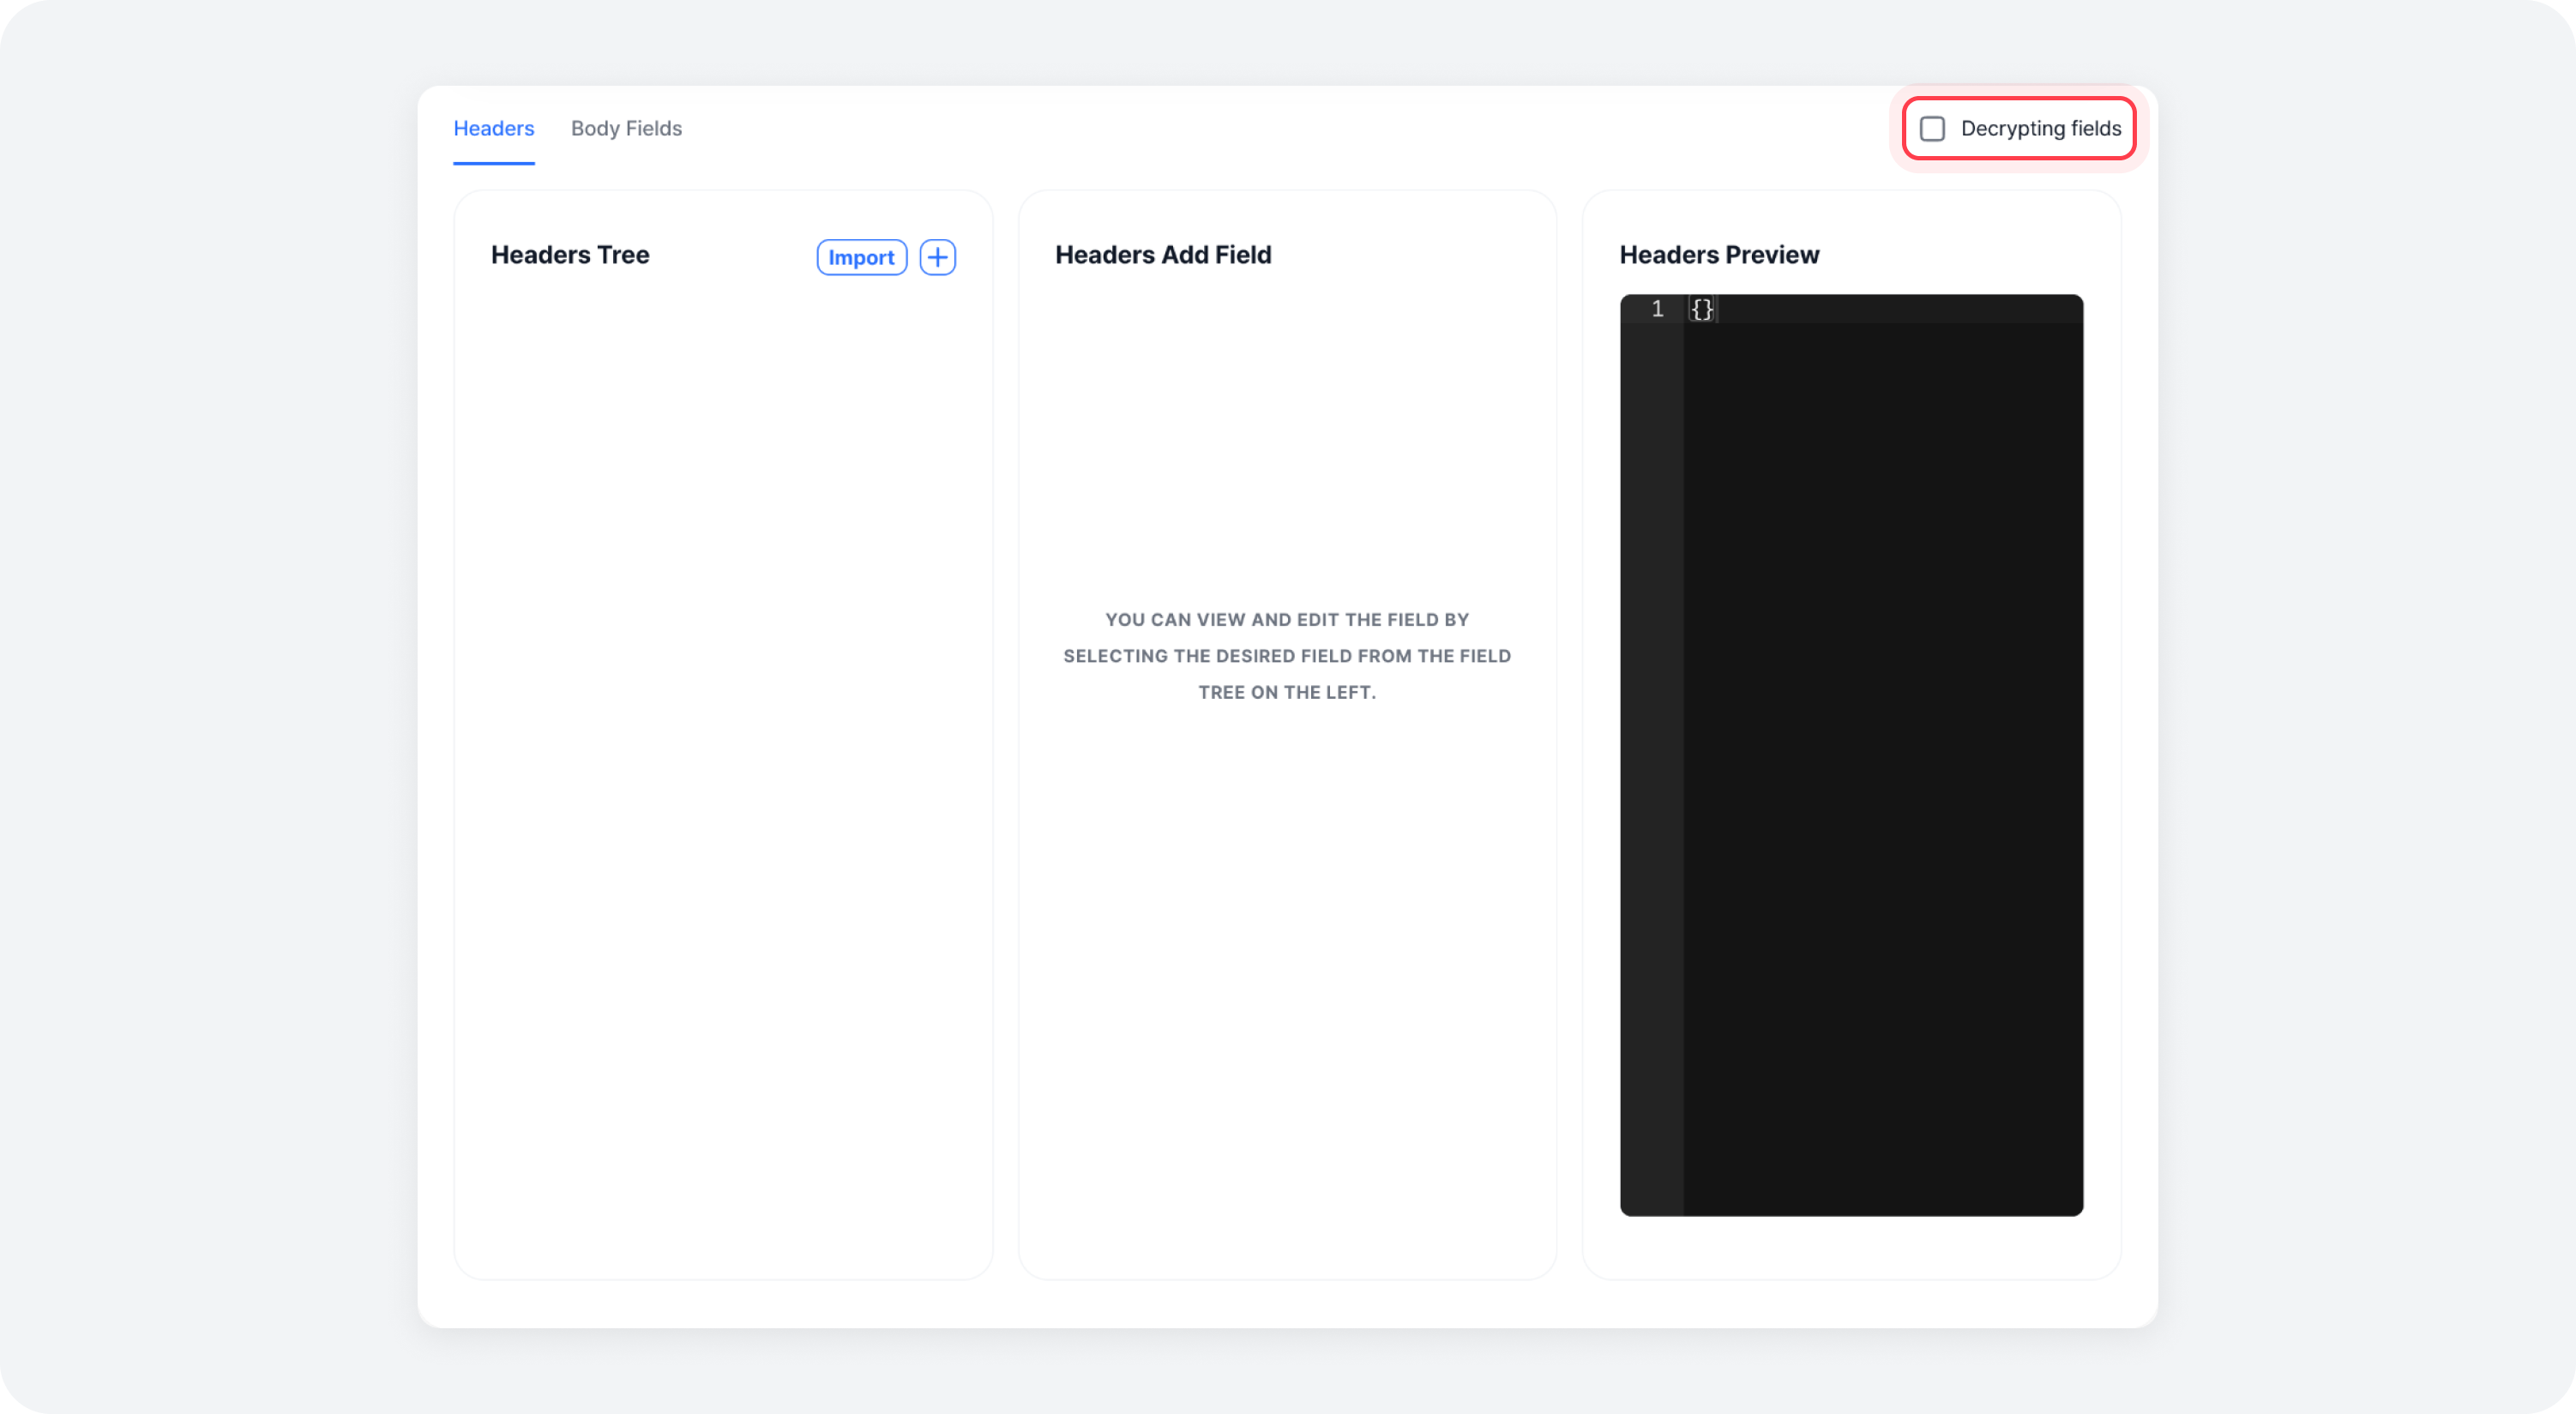
To decrypt an encrypted field, check the "Decrypting fields" checkbox. Note that this checkbox is only visible to System Admin users under RBAC.
Adding Custom Fields
First, click on the [Plus] button located at the top right of the Fields Tree.
Enter the information of the header and body fields you want to send to the recipient channel.
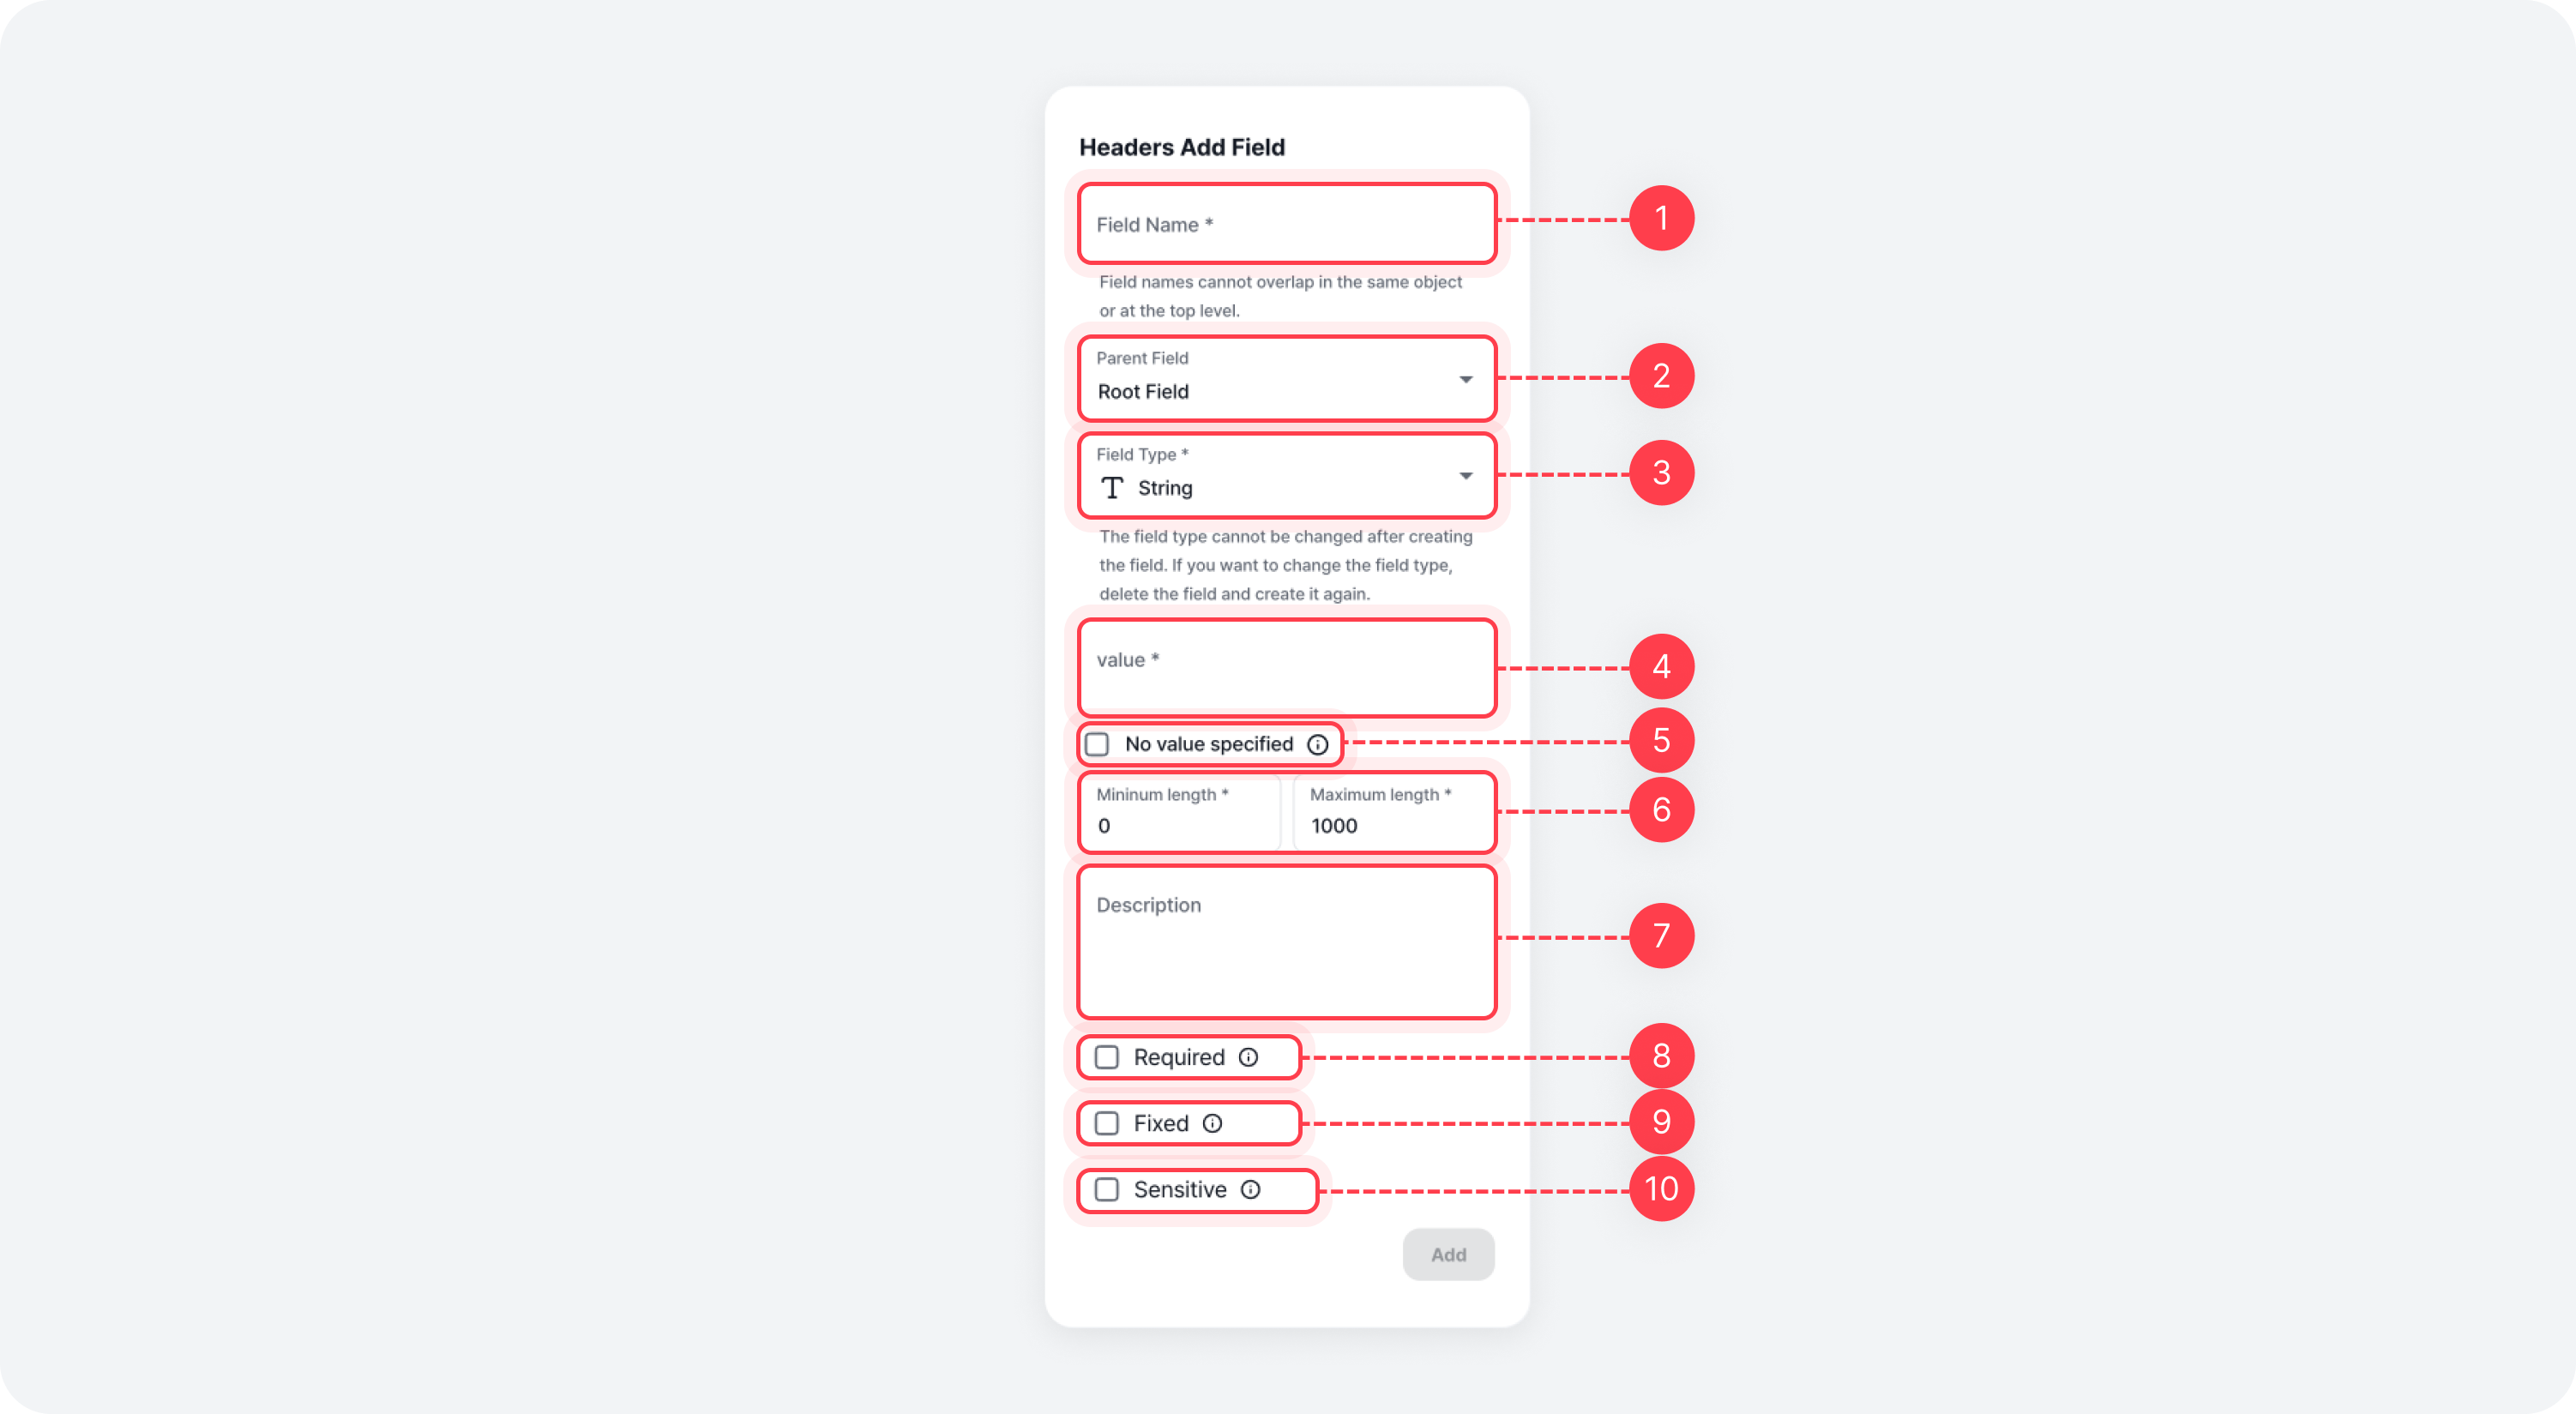
Field Input Information
| Field | Description |
|---|---|
| ⓵ Field Name | Name of the field |
| ⓶ Parent Field | Specify the parent field if the field belongs to an object or object list |
| ⓷ Field Type | Type of the field |
| ⓸ value | Value of the field |
| ⓹ No value specified | Whether the field's value should be set to null |
| ⓺ Minimum/Maximum Length | Value Minimum/Maximum Length of the field |
| ⓻ Description | Description of the field |
| ⓼ Required | When this flag is checked, the Value cannot be null |
| ⓽ Fixed | When this flag is checked, the Value cannot be modified during target creation/modification |
| ⓾ Sensitive | When this flag is checked, the Value is encrypted during custom recipient type and target creation/modification |
⓵ String ⓶ Number ⓷ Object ⓸ List< String > ⓹ LIST< Number > ⓺ LIST< Object >
The field type cannot be changed once the field is created. If you want to change the field type, you need to delete and recreate the field so please beware.
How to Use Object Field
For example, let's create a custom field with the following Object.
{
  "felice": {
    "name": "felice"
  }
}
⓵ Create an Object type field with the field name, felice.
⓶ Create a String type field with the field name, name, and select felice as the parent field, and create it.
How to Use List< Object > Field
For example, let's create a custom field with the following List< Object >.
{
  "felice": [
    {
      "name": "felice"
    }
  ]
}
⓵ Create a List< Object > type field with the field name, felice.
⓶ Create an Object type field with the desired field name.
⓷ Create a String type field with the field name, name, and select [felice > Field Name from ⓶] as the parent field, and create it.
Unlike List< Object >, if you want to create a field as List< String > or List< Number > type, you need to enter values directly like [1,2,3], ['felice', 'kafka'] in the Value.
⓵ Select the field you want to edit in the Fields Tree.
⓶ In the Fields Edit section for the selected field, enter the values to change, and click on the [Edit] button at the bottom of the Fields Edit section.
⓷ Repeat step ⓶ until you are done editing all the fields you want.
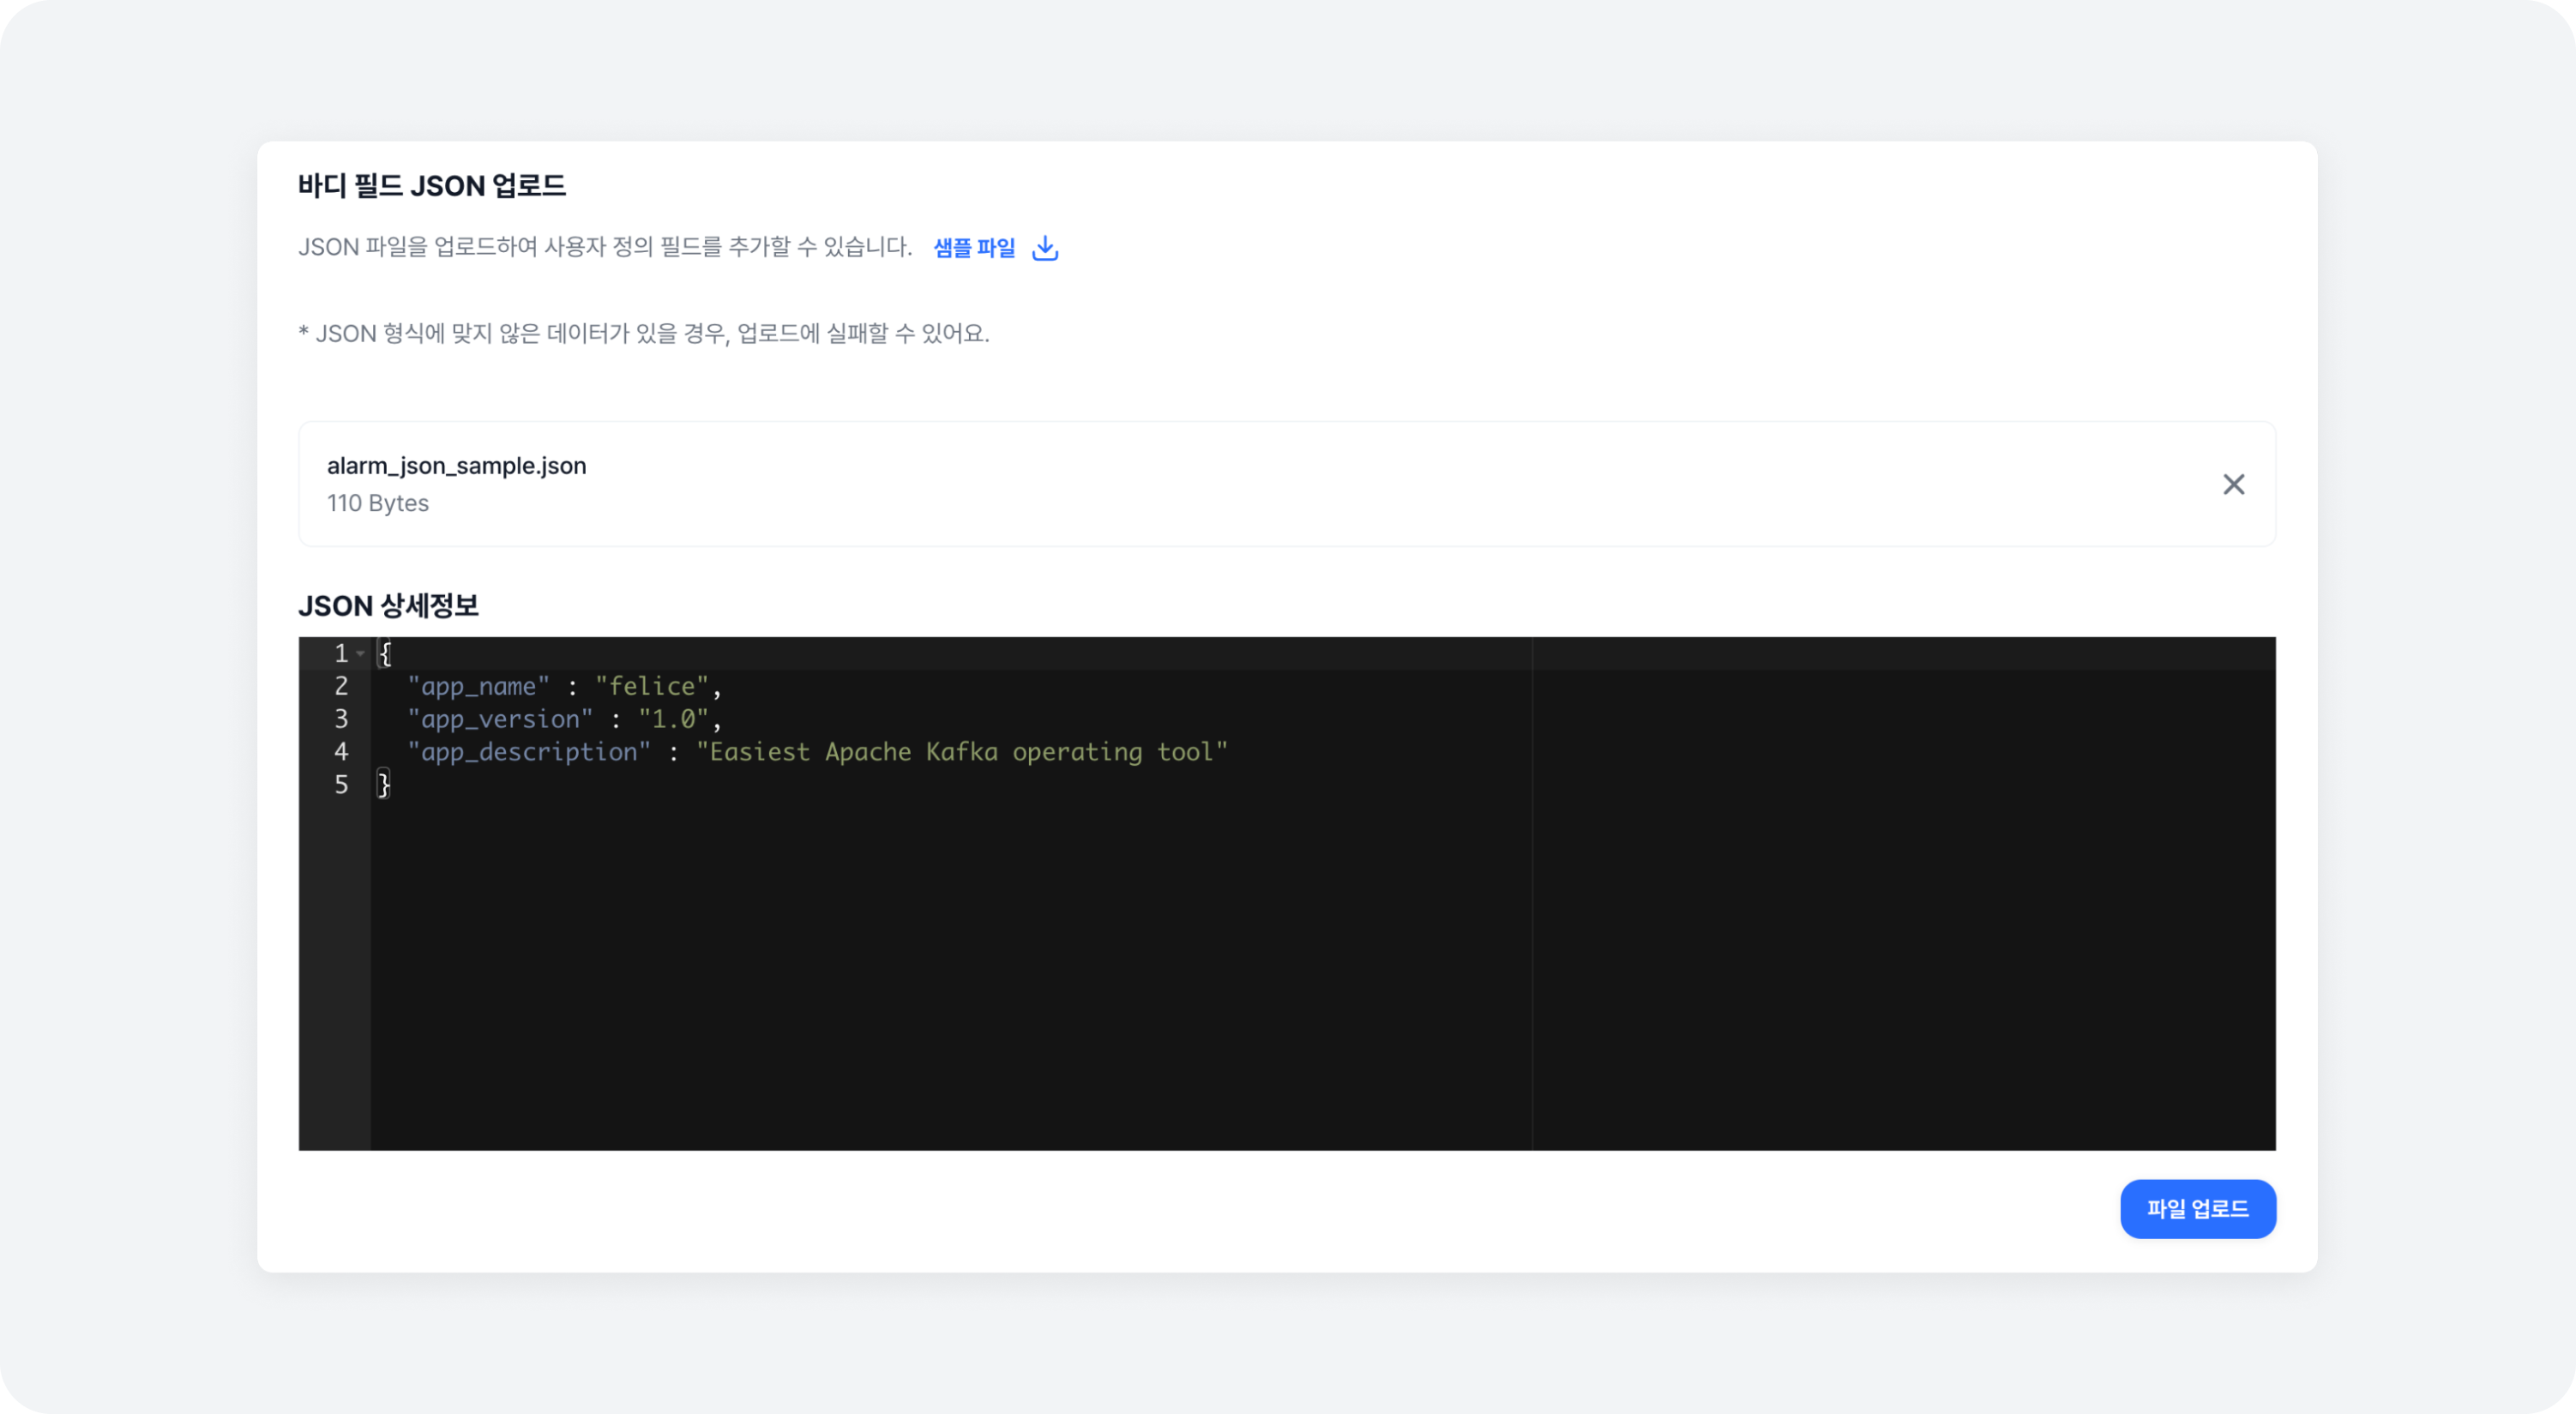
Adding Fields Using JSON Import
Click on the [Import] button located to the right of the Fields Tree, to import a JSON file through a modal and add multiple fields at once.
Note that if the JSON contains Object or List< Object > types, they cannot be imported from the header and can only be imported from the body.
If you have entered all the basic settings for the recipient type and custom fields, click on the [Create] button to create the custom recipient type.
Adding Predefined Values to Field Values
Predefined values are values defined in advance that will be replaced in the alarm message content. If predefined values are used, each of them will be replaced when the alarm is sent. For more details on predefined values, refer to the Type Management - Predefined Values document.
✨ Now, you can create targets with the custom recipient type you created!
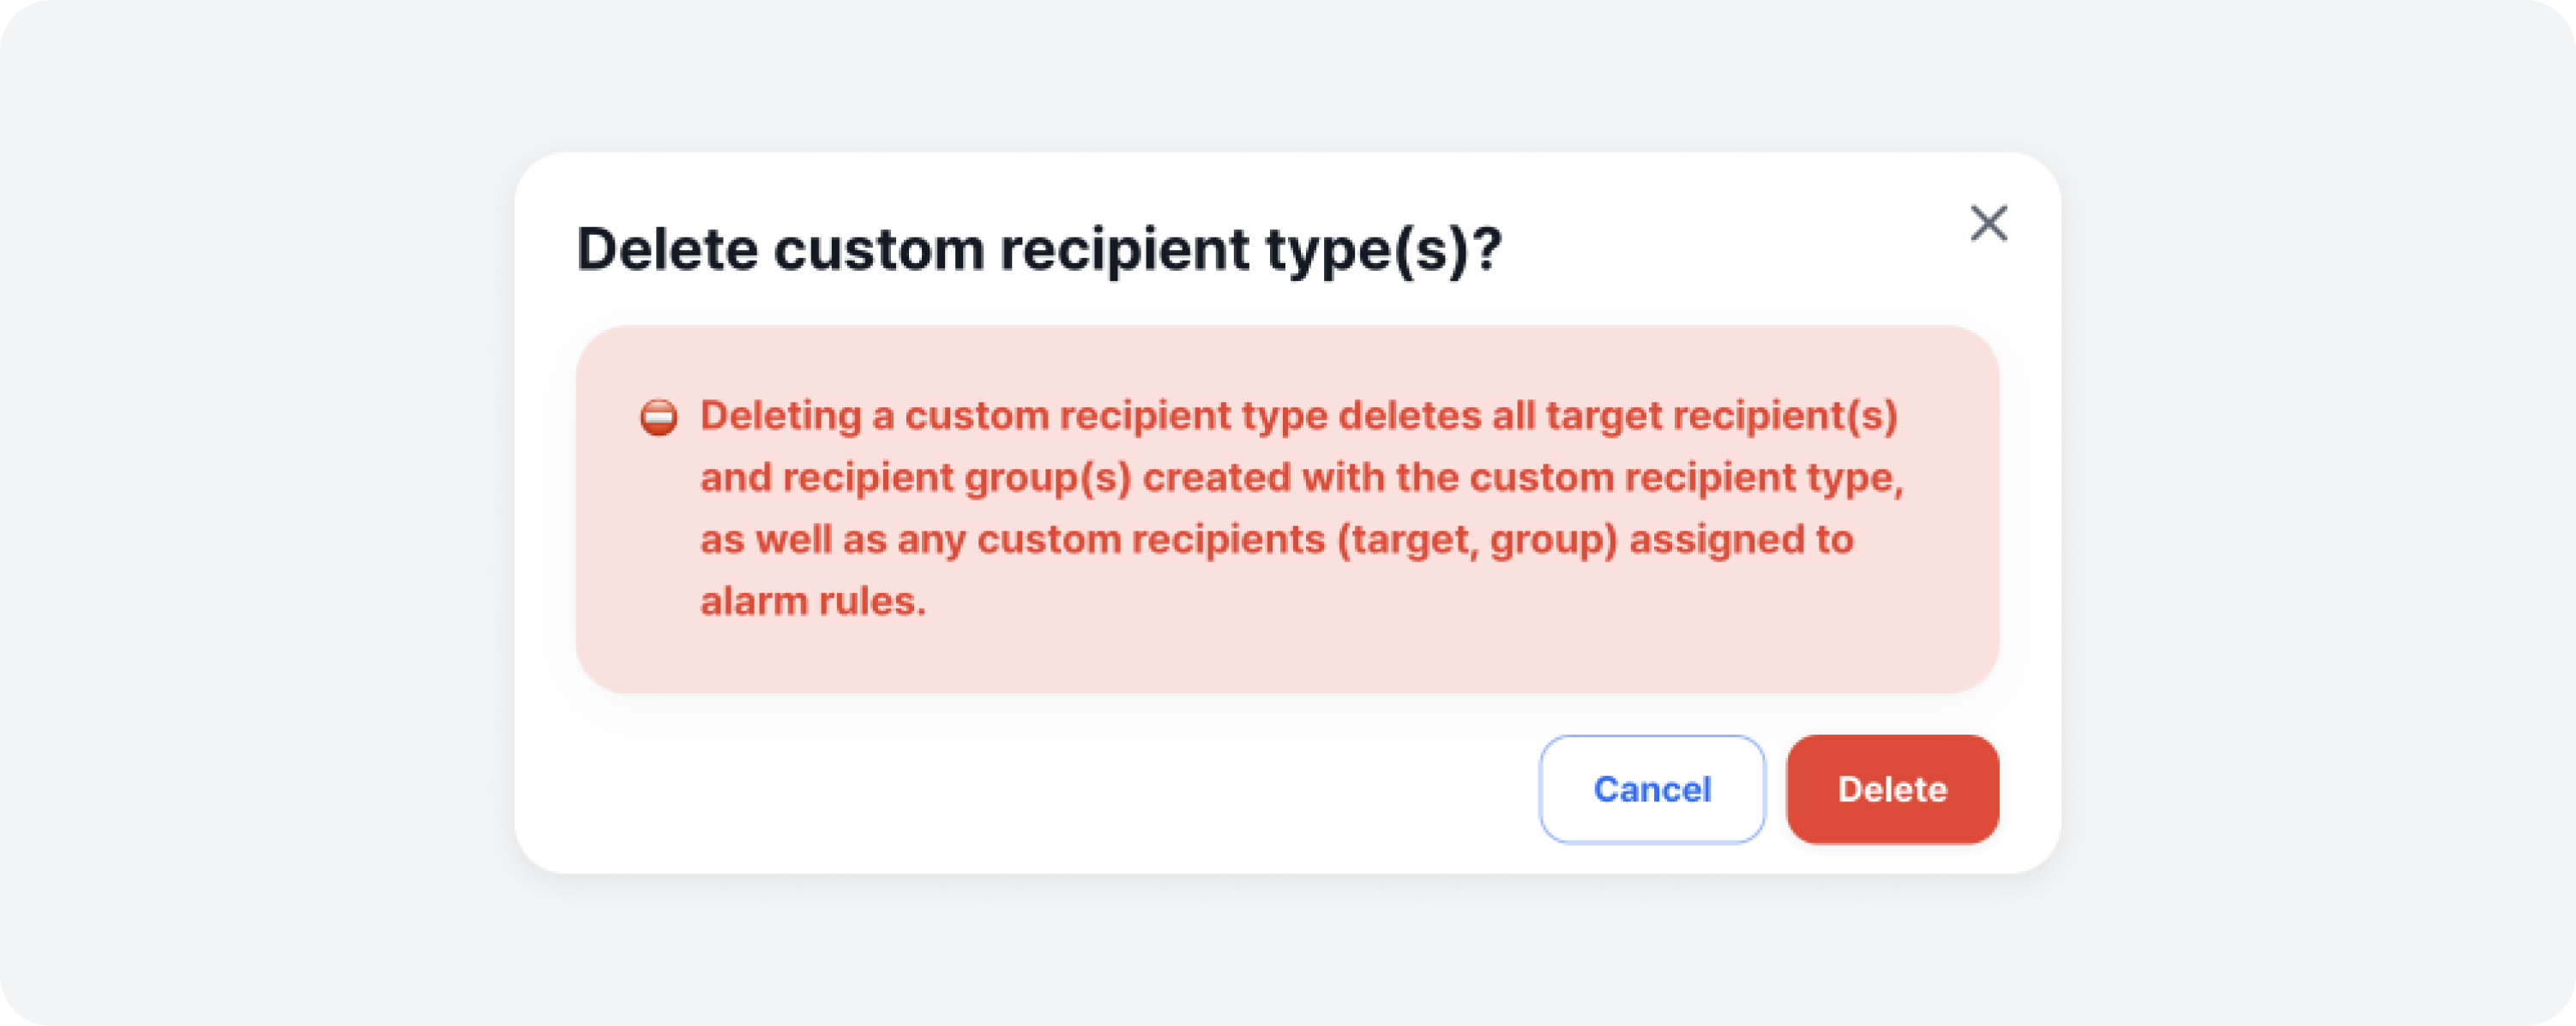
Deleting Custom Recipient Type
You can delete a custom recipient type that you no longer use. When you delete it, targets created with that custom recipient type are also deleted, and those targets are removed from any alarm rules they were registered in as well. Either select the ones you want to delete and click on Delete # custom recipient type(s) button, or click on the [Trash Can Icon] button that appears on the right of each row when you hover your mouse over the list, to delete the selected custom recipient type.